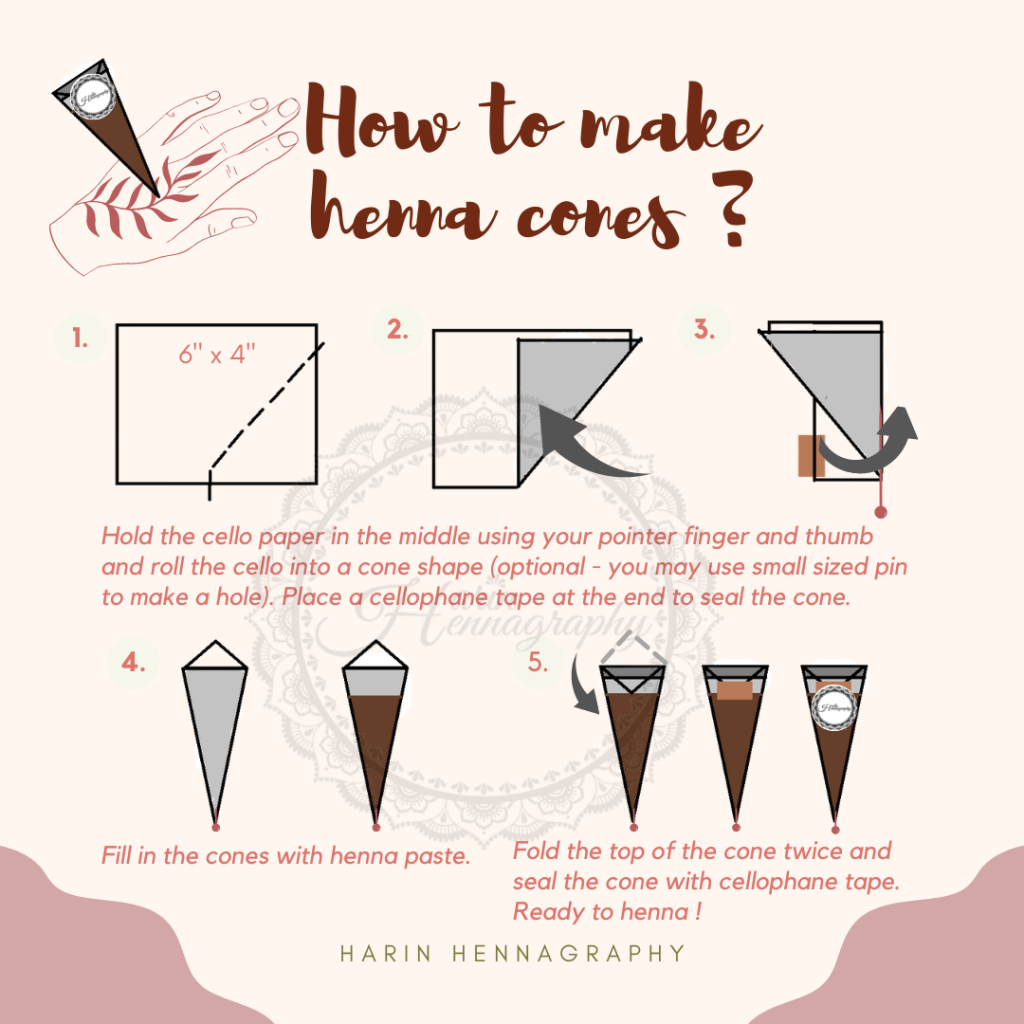
Roll, fill & seal henna cones
To make henna cones you would need :
– Cellophane rolls
– Scissors
– Scotch Tape
– Pins
– Henna paste (filled in carrot bag)
ROLL
- Cut a cellophane roll into a rectangle with scissors. I prefer small to medium cones therefore 6″ by 4″ would be just nice. If you would like a bigger cone you can cut the cello bigger.
- Then hold the cello in the middle and by using your pointer finger and thumb. Roll the cello into a cone shape creating a funnel with a small tiny hole for paste to come out. You can also insert a small sized pin at the tip of the cone for much fine work.
- Tape the cone at the end to seal. Add another tape at the top end to secure the cone.
FILL
- Fill the henna cones with henna paste from the carrot bag. If you are using pin remove the pin to allow the paste to be pushed down while filling.
- Make sure to fill it 1/2 or 2/3 of the cone, do not fill the cone full with paste as you would need to seal the cone later.
SEal
- To seal the henna cone, fold the top of the cone twice. Insert the pin back and seal the cone with scotch tape from top and the side. Viola the cones are ready to be used.

Keep henna cones in freezer if not using immediately. Cones can be stored up to 2 months in freezer. 20 minutes before using, just remove the cones from freezer to defrost.